Ornament Challenge with light~~ DIY Christmas Tree

 Hi, crafty friends! Yukiko I., Nicorin is coming again here!

Today, I am glad to showing the fun project for this season to you. 


I made a Christmas tree with the circuit. You can add the ornaments with the light on this tree.

If you are looking for an advent project for the kids, it can fit you. 

You can prepare some ornament kits with many different conductive materials, so kids can challenge how to connect their ornament to the circuit.

It may be a very creative activity.  I am going to share many ways to connect to the circuit with the material that may be in your house, not so special things, following this post in my Instagram account,@nicorin173 until Dec.

Today is the first day of this challenge. I am sharing here how to make the cone as DIY tree with the circuit. It is easy and needs just some simple materials.

Check the below movie if you interested in it. 
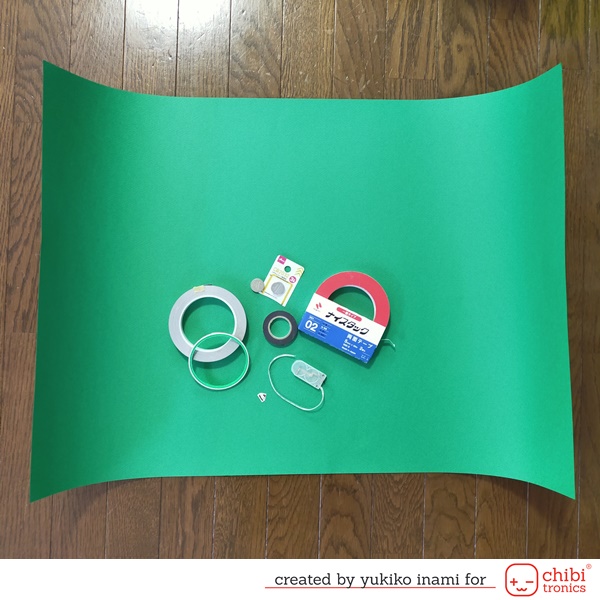

1.Materials

It's so simple.
1. Paper; I choose green. But you can choose any color.
2. Double-sided tape
3. LED sticker; there are 7 colors, white, red, blue, yellow, pink, orange, green
6.    Washi tape as a guide of the circuit (not essential but it makes it easy to make the truck of the circuit) 
7.   Battery supply; cell battery,  battery holder, USB battery, Chibi-chip can work with USB battery, paper battery holder, etc...
You can find many ways of power supply for your circuit on the Chibitronics site linking on the above line.

I show some examples of the power supplies in the below photo. 
But you don't need to worry! A just one 3V battery connecting circuit with the copper tape can work!


2. Make the Base of the Tree Cone

I roll the paper into my favorite shape. 
Then stuck the double-sided tape on the edge of the paper.
Next, I cut the end line making a horizontal line. I measure the line from top to edge with the ribbon.
You can see how I did it in my movie. There are more smart ways with making a development, hehe...
You can make it your favorite way!


3.Making the Circuit

I made the spiral circuit like the garlands on the face of the cone. 
I used the Washi tape as the guide of the truck of the circuit. 
It helps to keep a certain distance between the positive and negative circuit lines.
First, I stuck the Washi tape.
Next, I stuck the copper tape as a positive line, then the second copper tape as a negative line.
The power supply point is on the backside of the bottom backside.


I tested this circuit by setting a LED sticker on the truck of the circuit.
Yay! It worked well!!


OK!  I've prepared for starting my challenge.
I am excited about this challenge and looking around in the house for the conductive material.
If you have some good ideas, let me know about it posting with #chibitronics or giving comments on this post.


This is a sneak peek shot of the Day1 kit.  The first day is very simple. 
Is it fun to visualize before I show you my way?

Have fun with your sweeties this beautiful season!

Yukiko I. , (Nicorin)


コメント

人気の投稿