Have a Blooming Drive! --using the effect sticker--
Hi everyone!
I am happy to come here again. I am sharing a card having a scene of the blooming drive.
I use the LED sticker and the effect sticker. Enjoy the light effect!


It has an IC chip as a micro-controller. The controller changes the power to the lights in its circuit as programmed.
Chibitronics made 4 types of effects. There are Fade, Blink, Heartbeat, and Twinkle. You can see how they work here.
The Chibitronics site has nice tutorials and some templates for this sticker. You can know more about it there.
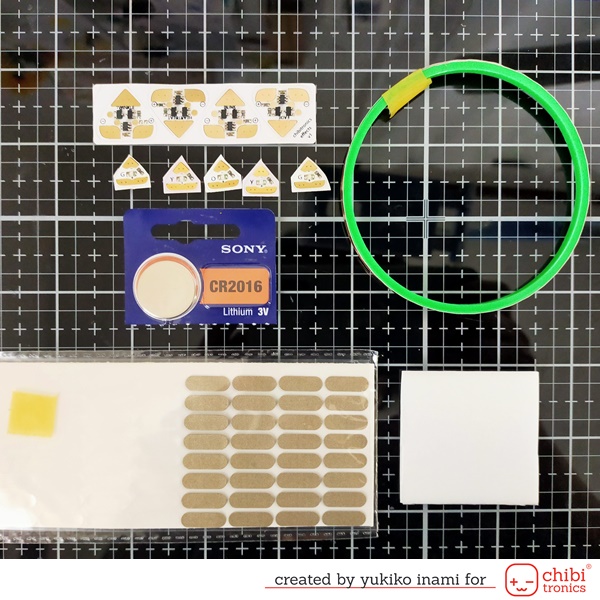
1.Supplies

・Car Garden Set; Flora and Fauna
・Bold Bloom Stencil; Newton’s Nook Designs

・Front panel; 4.25x5.5” I stamped the car image and sentiment on the center of the panel.
I colored with the stencil sheet around the car image.
・Circuit panel; 4.25 x 5.5"
・Card stock; 4.25 x 11" I folded it in half.
・LED stickers; Chibitronics
・Copper tape; Chibitronics
・Cell battery; CR2016 ( This number means the diameter;20mm, thickness;1.6mm)
・Conductive Fabric Tape (New release!)or Conductive Fabric Tape Patches; Chibitronics has released the tape-type conductive fabric.
・Foam sheet; 3mm thickness for the battery holder
・Foam strip; 3mm thickness, 5mm width for the edge of the circuit panel

2.Circuit

・Set the place of the LED sticker and mark with the cross.
・Mark the place of the battery.
・Decide the place the Effect sticker
・Draw the circuit path.
First, connect the battery positive side to the effect sticker’s positive pad and the battery negative side to the effect sticker’s negative pad.
Next, draw the first path from the effect sticker to LED starting from the signal pad of the effect sticker and going through the LED sticker positive and negative pad alternatively. (shown with the green line)
Then the second path starts from the positive pad of the effect sticker and connects the LED positive pad free from the first path. (shown with the red line)
And the third path starts from the negative pad of the effect sticker and goes through the free negative pad of LED. (shown with the blue line)
You can trace the path in the photo showing above. It looks complicated. But don't be scared, you can track the path and confirm the pathway of electricity.
This way can make alternating effects with a single effect sticker.
・Stick copper tape on the drawn path.
Remain the 5inch copper tape on the end of the positive path connecting the positive side of the battery.
Remain the 5inch copper tape on the end of the positive path connecting the positive side of the battery.
・Stick the LED stickers, press firmly on the metal pads
・Stick the effect sticker

Confirm the circuit works well. And reinforce the connections of the stickers and circuit by over-layering with the copper tape or the conductive fabric tape.
Making the battery holder with a 3mm foam sheet.
Foam sheet; 2.5x2", cut out 1.25x1.75" and the circle shape for the cell battery.

Set the outside frame.

Stick the paper on the frame of the battery holder.
Stick the positive path on the paper going through the front side to the backside.

Reinforce the connection of the effect sticker and circuit with the conductive fabric tape.
Stick the conductive fabric tape on the battery point for secure contact.

Cover the battery with the lid of the paper having a part of the circuit.
When you push the switch point over the battery, the circuit is completed and the lights are on.
3.Assembly
I stick the foam tape on all edges of the circuit panel, then set the front panel on the circuit panel.
Set it on the card base.
I added the ribbon strip on the battery holder. Because it helps to pull out the holder.
Stick the press here mark on the core of the flower.
Finished!

Thank you for stopping by!
Have a wonderful May!
Yukiko I. /Nicorin


コメント
コメントを投稿